Praktika
Diagrams of the Eight Stages of Shooting (Shaho - Hassetsu) by ANKF.
Kyudo Glossary by ANKF.
Kyudo Glossary by Issha Kyudo Kai – Uppsala Kyudoklubb.
Metodinė medžiaga (Leonardo da Vinci mobilumo projektas „Sporto trenerių įgūdžių tobulinimas taikant ES šalių patirtį“)
Metodinė medžiaga (Erasmus+ projektas „Kvalifikacijos tobulinimas sporto organizavimo ir mokymo specialistams“ Nr.2018-1-LT01-KA102-046893).
Lankstinukas projektui „Pažintinių-mokomųjų kyudo renginių ciklo organizavimas ir vykdymas“ Nr. SRF-SIĮ-2019-1-0412.
Practice can differ between different schools and styles of kyudo, and even between dojo of the same style, the form of practice can vary. To harmonize practice and ceremonial shooting (sharei) in 1953 the All Nippon Kyudo Federation (ANKF) formed an establishing committee from the main schools to take the best elements of each school and form the ANKF style that is used today throughout Japan and in most kyudo federations outside of Japan.
In kyudo there are three kinds of practice - geiko:
- mitori geiko - receiving with the eyes the style and technique of an advanced archer;
- kufu geiko - learning and keeping in mind the details of the technique and spiritual effort to realize it;
- kazu geiko - repetition through which the technique is personified in one's own shooting.
The five forms of shooting (gosha) are:
1. MAKIWARA MAE - in front of makiwara;
2. KOMATO MAE - 28m distance mato; why 28m?
3. YÔ MAE /TEKI MAE - in front of the enemy;
4. SASHIYA MAE - many arrows (sometimes also called „kazuya“);
5. TÔYA MAE - shooting on a great distance, i.e. Sanjusangendo etc.
Gomuyumi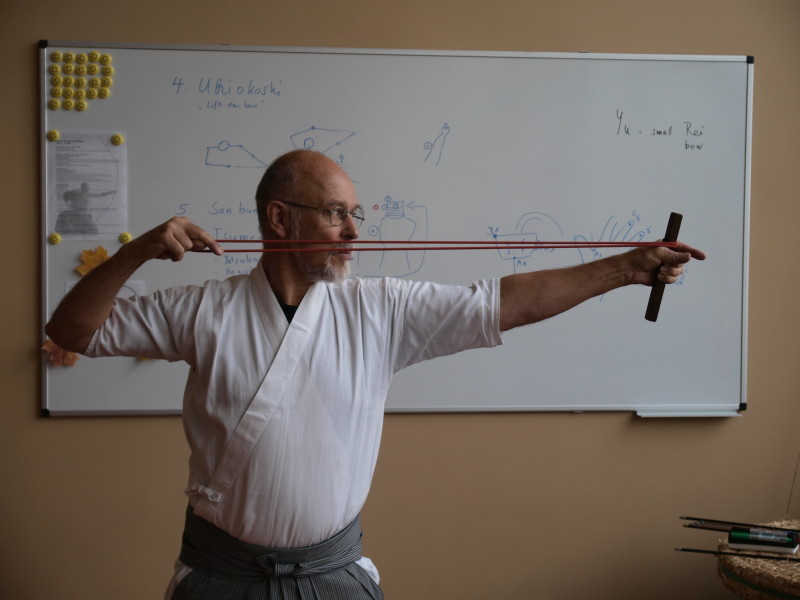
The learning of kyudo starts with a rubber practice bow (gomuyumi) and by practising the movements of the hassetsu (eight steps).
The next step for a beginner is to do karabiki training with a bow without an arrow to learn handling of the bow and performing hassetsu until full draw. Handling and maintenance of the equipment is also part of the training.
After given permission by the teacher beginners start practicing with the glove and arrow. Next steps may vary from teacher to teacher, but include practicing first yugamae, then the draw and last release and shooting at makiwara.
When a beginner is starting to shoot at a mato (target), they may be asked to shoot from half or three-quarters distance from the usual 28 meter distance.
Advanced beginners and advanced shooters practise shooting at makiwara, mato and some with omato.
Makiwara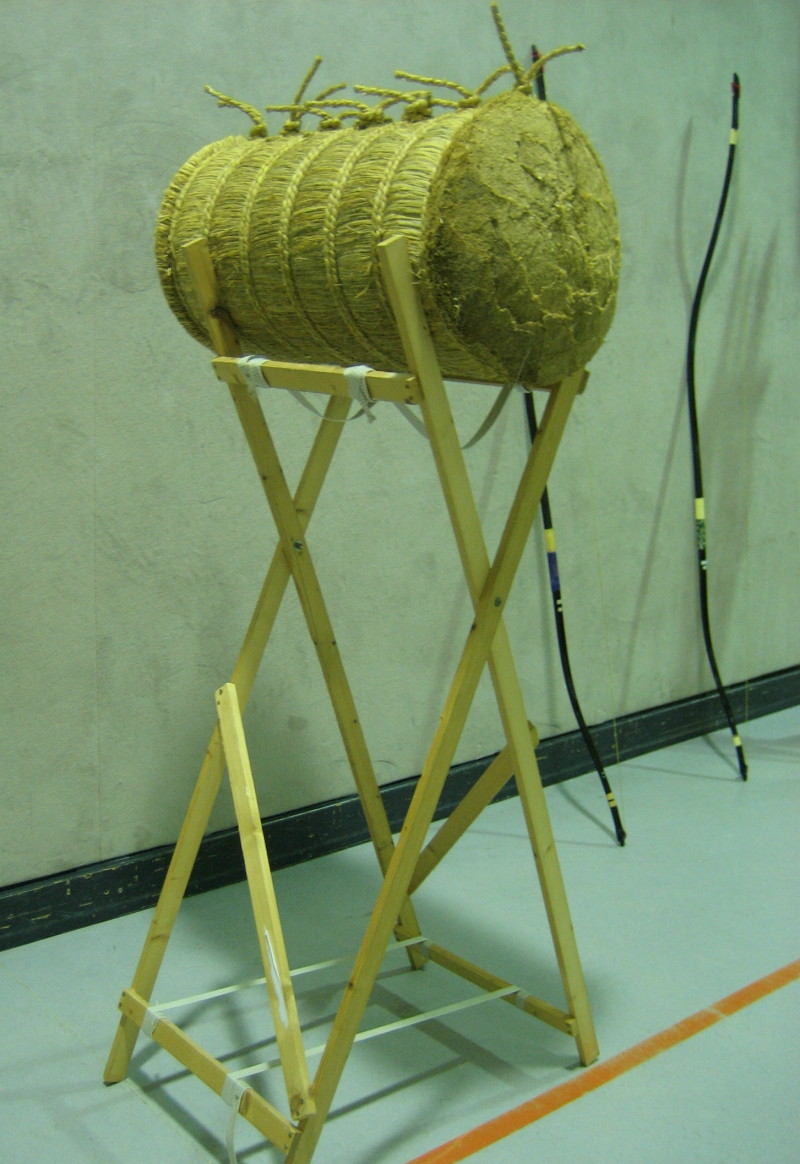
A Makiwara is a specially designed straw target. The makiwara is shot at from a very close range (about seven feet, or the length of the archer's strung yumi when held horizontally from the centerline of his body). Because the target is so close and the shot most certainly will hit, the archer can concentrate on refining his technique.
Mato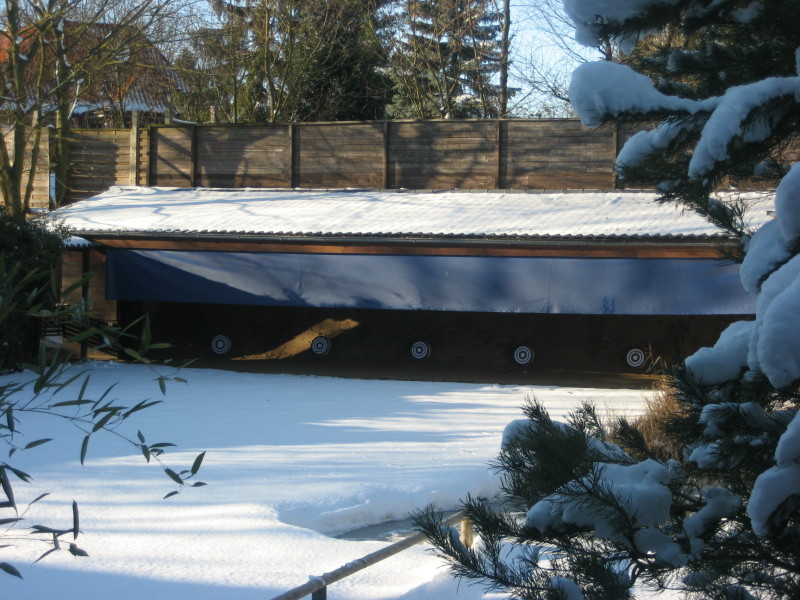
Mato is the normal target for most kyudo practitioners. Mato sizes and shooting distances vary, but most common is hoshi mato thirty-six centimeters (or 12 sun, a traditional Japanese measurement equivalent to approximately 3.03 cm) in diameter shot at from a distance of twenty-eight meters. In competitions and graduations hoshi mato is used. For ceremonies it is most common to use kasumi mato which is the same as hoshi mato but with different markings.
Omato
Omato is the mato used for long distance enteki shooting at 60m distance. The diameter of omato is 158 cm. There are separate competitions also for enteki shooting.
There are three levels of skill:
1. Toteki, the arrow hits the target.
2. Kanteki, the arrow pierces the target.
3. Zaiteki, the arrow exists in the target.
All kyudo archers hold the bow in their left hand and draw the string with their right, so that all archers face the upper seat (kamiza) of the dojo while shooting.
Unlike other archers (who, with some exceptions, draw the bow never further than the cheek bone), kyudo archers draw the bow so that the drawing hand is held behind the ear. If done improperly, upon release the string may strike the archer's ear or side of the face.
Resulting from the technique to release the shot, the bow will (for a practised archer) spin in the hand so that the string stops in front of the archer's outer forearm. This action of "yugaeri" is a combination of technique and the natural working of the bow. It is unique to kyudo.
Kyudo technique is meticulously prescribed. The All Nippon Kyudo Federation (ANKF), the main governing body of kyudo in Japan, has codified the HASSETSU (or "eight stages of shooting") in the Kyudo Kyohon (Kyudo Manual).
 1. ASHI BUMI - placing the footing. The archer steps onto the line from where arrows are shot (known as the shai) and turns to face the kamiza, so that the left side of his body faces the target. He then sights from the target to his feet and sets his feet apart so that the distance between them is equal to his yatsuka, approximately half his body height, and equal to the length of an arrow. A line drawn between the archer's toes should pass through the target after the completion of the ashibumi. During competition, an archer may have a second set of arrows sitting on the ground at his or her feet. To be correct in Ashibumi, these arrows must not extend in front of or behind the archer's footing stance. The archer's feet are then placed outward at a 60 degree angle from each other, forming a "V", this ensures equal balance to both feet.
 2. DO ZUKURI - forming the body. The archer verifies his balance and that his pelvis and the line between his shoulders are parallel to the line set up during ashibumi. During Dozukuri, the kyudoka will arch his or her back, straightening the back and causing the buttocks to stick out slightly behind. Practically this posture is to prevent the strings of the hakkama from being clipped by the bowstring during shooting as well as ensuring the back of the archer is very straight, which, in turn, prevents the bowstring from striking the archer's face when shooting.
 3. YU GAMAE - readying the bow. Yugamae consists of three phases:
1) TORI KAKE - gripping of the bowstring with the right hand;
2) TE NO UCHI - the left hand is positioned for shooting on the bow's grip;
3) MONO MI - the archer turns the head to gaze at the target.
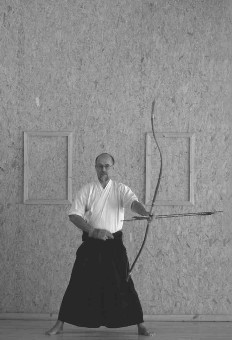
 4. UCHI O KOSHI - raising the bow. The archer raises the bow above the head to prepare for the draw.
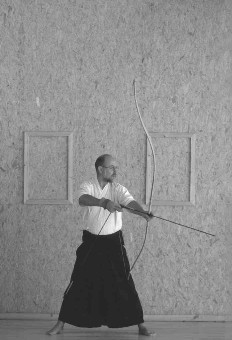
 5. SANBUN NO NI (Hikiwake) - drawing apart. The archer starts bringing down the bow while spreading his arms, simultaneously pushing the bow with the left hand and drawing the string with the right, until the arrow is level with the eyebrows. Controlling and correcting the shoulders, arms, etc.
1) Daisan, Big three. This forms the midway point in Hikiwake.
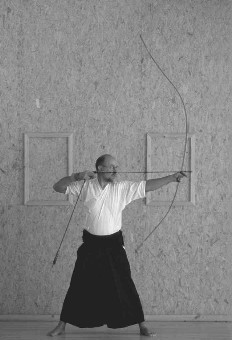 6. KAI - the full draw. The archer continues the movement started in the previous phase, until full draw is achieved with the arrow placed slightly below the cheekbone. The arrow points along the line set up during ashibumi.
1) TSUME AI - constructing the vertical and horizontal lines of the body;
2) NOBI AI - uniting the expansions of the body.
7. HANARE - the release. The technique results in releasing the bowstring from the right hand.
 8. ZAN SHIN - "the remaining body or mind" or "the continuation of the shot". The archer remains in the position reached after hanare while returning from the state of concentration associated with the shot.
1) Yudaoshi, lowering of the bow.
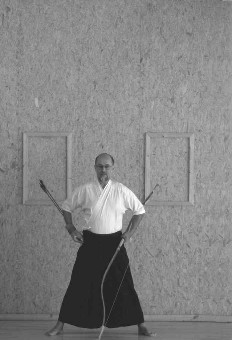
(photos from Alster-Dojo)
Hassetsu in shamen-style (Christiane Schoniger, 4.Dan) and shomen-style (Shigeyasu Kameo, Renshi 5.Dan).
(photos from Kyudo-Verband Hessen)
The Importance of Basics
It is very common when learning anything new to want to quickly move away from the basics. In kyudo, new students sometimes believe that the earlier they learn the Hassetsu the quicker their teacher will move on to more important instruction. The problem with that thinking is that the Hassetsu themselves are the most important element of proper shooting. One should not think of them as basic in the sense of "simple" but as basic in the sense of "crucial." Watch a highly skilled kyudo master and you will notice that they haven't left the Hassetsu behind. Instead they carefully and precisely perform each step of the Hassetsu, just as a novice does. But unlike the novice, the Master transitions through each stage of shooting with a natural ease that is the result of long years of study. The Master understands that the Hassetsu, like the nodes on bamboo, are separate yet critical parts by themselves, but become most important when they combine to form a unified whole.
Ref. Kyudo Kyohon Vol. 1 pg. 59
Dan grades requirements by ANKF
1st Dan (Sho-Dan): The shape of the shooting form and formal movement should be suitable for the level of shooting. There should not be disarray in the placing of the arrows.
2nd Dan (Ni-Dan): Both the shooting form and formal movement should have good arrangement with evidence of spiritual energy in the technique. There should be less uncertainty in the placing of the arrows.
3rd Dan (San-Dan): The shooting form is better established and the formal movement is more stable. The breathing is ordered and the method of using shooting technique is correctly obeyed. The arrow should fly straight, and there should be more consistency in hitting the target.
4th Dan (Yon-Dan): In addition to having the elements of the previous level, there should be correct breathing and the release should be sharp. Consistency should be reached in hitting the target.
5th Dan (Go-Dan): The shooting form, the shooting technique, and the method of formal movement should be suitable for the level, with evidence of refinement in the shooting. In particular, progress should be shown over the previous levels.
6th Dan (Roku-Dan): At this level, excellence of technique should be far more prominent than in previous levels.
7th Dan (Nana-Dan): Shooting form, shooting technique, and formal movement, are evident naturally in the body. The shooting has reached a high level of refinement and mastery.
8th Dan (Hashi-Dan): There should be perfection in the technique, the highest level of refinement and embodiment of skill in the art of shooting.
9th Dan (Ku-Dan): The truth of Kyudo should be transparent.
10th Dan (Ju-Dan).
Ref. Kyudo Kyohon Vol. 1 pg. 126
Shinsa in Europe can be taken up to the grade of Go-Dan only. For Roku-Dan and Renshi examination, applicants will have to take the shinsa in Japan.
Shinsa Unified Criteria (for Godan and under) - 2016.
Written Examination Questions for Local & Regional Shinsa
Shooting Procedure in Shinsa
How to perform Rissha (Standing Form)
Shooting Procedure in Kyōgi
This website shows formal shooting order. It shows standing (risha) and kneeling (zasha) forms as well as group shooting. It also has movies of the correct form for dealing with various mishaps that can occur such as dropping an arrow or breaking a string.